In preparation for the first WordPress Bug Hunt this weekend Mark Jaquith has written some excellent instructions on how he “does work” on WordPress on Linux / Mac OS X.
Skippy who is one of the hosts of the bug hunt was looking for a Windows version of Mark’s cheat sheet – So here or those of you using Windows the following instructions show you how to achieve the same things.
First of all you need to install an svn client, the svn client of choice on Windows has to be TortoiseSVN which is not only a subversion client but also includes patch application functionality and visual merge tools. Once you have installed TortoiseSVN you will now be set and ready. So here is the “Working on Windows” version on Mark’s instructions:
Create a new directory on your pc to store the checkout.
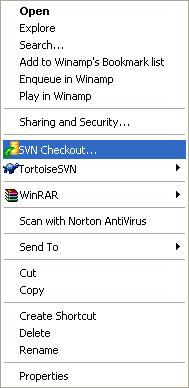
Checkout the repository by right clicking on the folder and selecting “SVN checkout…” like this:
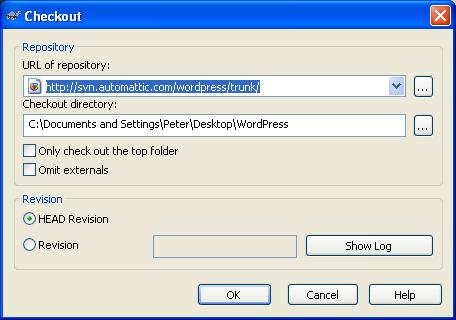
Enter the repository url (
http://svn.automattic.com/wordpress/trunk/) in the dialogue and click on OK:
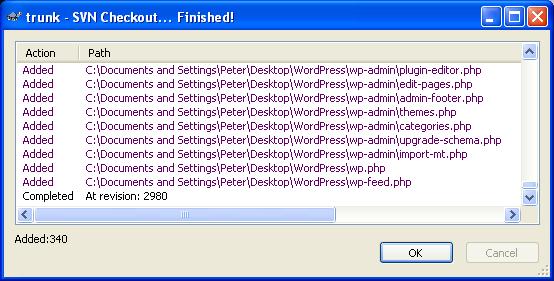
At the end of the checkout you should be presented with a dialogue like this:
And the folder containing the checkout will now have a new icon to show that is contains a svn checkout:

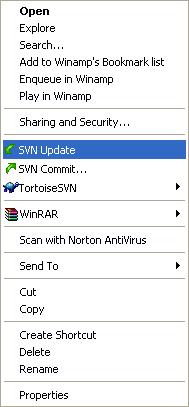
Updating your working copy of the repository is as simple as right clicking on this folder and selection “SVN update…” like this:
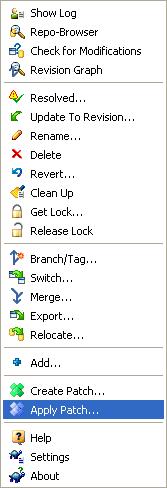
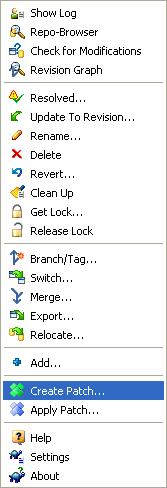
Making a patch for a file or the whole checkout containing you changes is as simple as right clicking on the file/folder and selecting “Create Patch” from the “Tortoise SVN” submenu available when you right click:
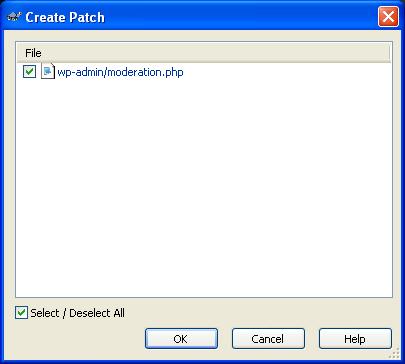
You can the select the files to include in the patch in the next dialogue, before you save the patch:
Applying a patch is as simple as selecting “Apply Patch” from the “Tortoise SVN” submenu available when you right click on the folder containing the svn checkout:
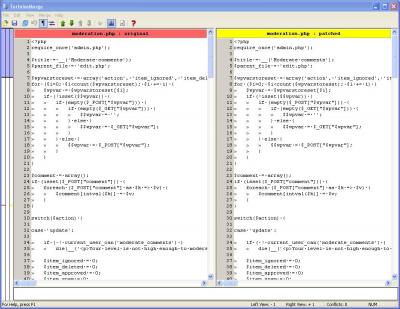
You will then be able to see the differences contained in the patch for each file changed in the “TortoiseMerge” window that appears:
To apply the patch if you are happy with the changes you right click on the file/files in the “Files Window” and select “Patch All”:
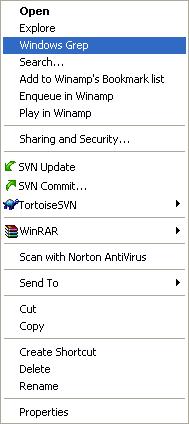
If you want to search through the checkout of WordPress for a string you can use WinGrep
. Once installed it can be accessed from the right click menu on a file or folder like so:
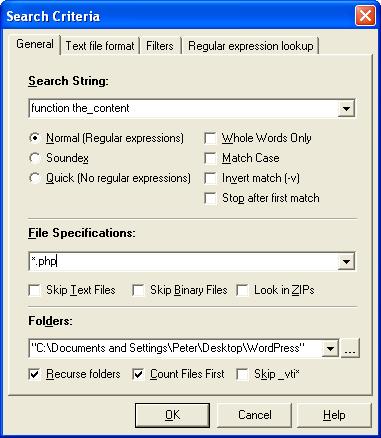
You are then presented with the following dialogue in which you need to enter two things. Firstly you need to specify your “Search String” which here is “
function the_content” and you also need to specify the “File Specification” which here is “*.php” so as to only search php files.
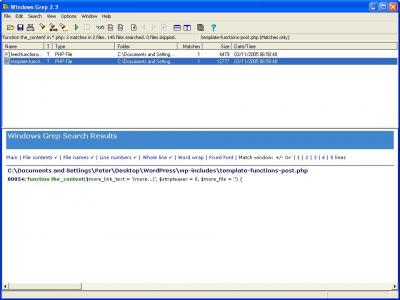
The results are then presented like this:


Didn’t know it could be that easy. Thanks for the step by step instructions.
To be honest Michael neither did I until I tried. Like Mark and Skippy I do all my WordPress work on a linux server.
I do develop on Windows at work though and thought that it must be simple to do the sorts of things Mark had described so I had a play and the instructions above are the results 🙂
Excellent! I used to do my development on Windows, and I used TortoiseSVN and WinGrep, just as you suggested.
hey, thanks for this tut, until now SVN was a scary thing for me to use, now it looks as if its kids play!! 🙂
Pingback: Mark Jaquith’s WordPress Blog » Blog Archive » My WordPress Toolbox
Pingback: Mark Jaquith’s WordPress Blog » Blog Archive » Bug Hunt on Saturday
Pingback: skippy dot net » Bug Hunt Preparations
Pingback: WordPress Comings And Goings at Literal Barrage
Pingback: Peter Westwood » It’s bug hunt time.
I just wanted to say thanks for posting these instructions, i never realised it could be so easy!